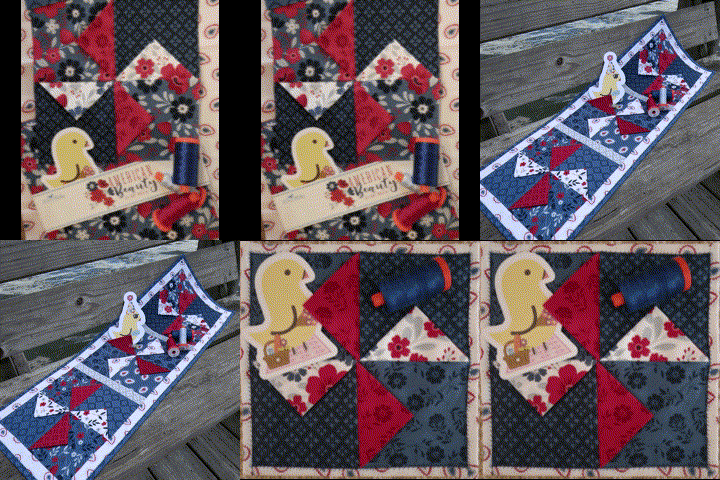
Hey quilter's...well it's finally Friday! I wish for y'all to have a restful long Holiday weekend. I know I'll be doing my usual but that's o.k. too. I'm excited to share w/ y'all the trivet to go along with the "Party-Point-Celebration" Runner. Yes, I always make a trivet but it does have a positive note. I love to have a coordinating trivet for entertaining but this also lets me practice my quilting for the runner too. I love to see what style/stitches that I can do within the design on a small scale. I've been sharing basic quilting techniques geared toward the new beginner levels of quilting but you can always do advanced techniques. I've even stepped way out of my comfort zone and created a "reel" this morning. I'm hoping I can upload to share here on blog. I seriously need my 14 yr. old grandson :-) The trivet is used with "Insul-bright" for hot/cold items that I add in after I've quilted my block. Less bulk then I top stitch at end to secure all layers. This is the first collection of the 3-part Series "America...Sew Beautiful," Celebrating & Honoring our Country. I'll be sharing the next project real soon. If you need supplies my link to Missouri Star Quilt Company will save you 20% off $50. or more for the month of May. I hope y'all have a Blessed weekend...doing what you enjoy! Thank y'all so much for following and have a great Memorial weekend!
Blessed Quilting from My Home to Yours,
Cat
MSQC Affiliate
Paid Partnership w/MSQC
Follow on Instagram...Facebook & Pinterest (links upper right on home page)
Here's all you do...
* Use scraps from runner... Rotary cut 2... 5 x 10" squares (2 different blue prints)
* Subcut into 2...5 x5 squares each. Will make 4 squares.
* Alternate squares to make a 4 patch design.
* Rotary cut white and red scrap fabrics the same way to make your "party-points"
* Alternate your "party-points" per deign within the squares.
* Top stitch along the raw edge (1/8" seam allowance) of party-points to secure to square following design.
* Sew squares 2gether using the 4 patch directions as previously stated on Table runner.
Border/Binding...
* Rotary cut from white paisley fabric two strips 2 x 91/2 and sew with right sides together using a 1/4" seam allowance to top/bottom of block. Press
* Rotary cut 2 strips 2 x 12 1/4 and sew as above to the left/right side of block. Press.
* Rotary cut batting to 9 1/2 x 9 1/2 and place behind block and quilt as desired. This gives you a chance to practice your quilting on a small scale.
* Rotary cut backing/insulbright to 9 1/2 x 9 1/2.
Layer backing...right side down...insul-bright then block facing right side up.
* Starting at top...fold over border to back of block leaving a 1/4" binding on front. Fold in half agin on back of block to fold in raw edge.
* Repeat same step for bottom...then left/right sides.
* Top stitch on front of block to secure fold on back.
* Finishes 9 1/2 x 9 1/2
Note...I like to do a crazy stitch to catch the fold on back plus it gives a fun decorative stitch on front :-)


